ASP.NET Core: Simple shared components with React
There are a lot of approaches to sharing components between React projects (StoryBook, Lerna, private npm registries, etc.), but what if you just created 2 new ASP.NET Core app using dotnet new react (let’s say Front Office app namedFront and Back Office app calledBack) and wanted a simple way to share React components between these 2 apps?
Well my friend you are on the right blog article, let’s see together how we can achieve this scenario using one of the simplest way of doing it!
tl;dr: you can find a working example on this github repository
Workflow
I propose us to create a simple npm library (called shared in this example) with it’s own simple build workflow (to transform Typescript files into JavaScript files + typings, etc.), and then install our library inside of our Front and Back React apps.
Hard to make it simpler, isn’t it? But wait, there are few pitfalls so let’s now review together step by step how we could implement this simple workflow.
The apps organization used in this example will be the following:
+---Back
|   \---ClientApp
|       +---App.tsx
|       +---package.json
|       +---...
+---Front
|   \---ClientApp
|       +---App.tsx
|       +---package.json
|       +---...
+---shared
|   \---src
|       +---components
|       |   +---BlueButton.tsx
|       +---sass
|       |   +---BlueButton.scss
|       +---package.json
Initialize our shared components library
Let’s create a new npm library which will generate in a dist folder Javascript and typings files from Typescript source code, as well as copy SASS files for styling.
Inside of your shared folder, run the npm init command to show the npm library creation wizard. You can keep all the default values and just give a name to your library (such as shared). This should generate your package.json starting file
Then install Typescript (if you want to use it) as well as React
npm i --save-dev typescript
npm i --save-dev @types/node
npm i --save-dev @types/react
npm i --save react
npm i --save react-dom
Now the first very important step (which was found by my dear colleague Mikaël): Edit your
package.jsonfile and movereactandreact-domfromdependenciestopeerDependencies. This is a crucial step to do because if you don’t, oursharedlibrary will use it’s ownReactversion and break ourFrontandBackapps if you useReact hooks… You should have something looking like the following:"peerDependencies": { "react": "^16.0.0", "react-dom": "^16.0.0" },
You will also need to add a tsconfig.json file such as:
{
    "compilerOptions": {
        "jsx": "react",
        "declaration": true,
        "outDir": "./dist/",
        "esModuleInterop": true,
        "moduleResolution": "node",
        "rootDir": "./src"
    },
    "include": [
        "src/**/*"
    ]
}
Now the second most important part (to me), is the scripts which will make all the package generation process smooth.
Modify the package.json file to add copy-sass (to copy our SASS files), build-ts (to generate our Javascript and typings files) and build (to call the copy-sass and build-ts) scripts:
"scripts": {
  "copy-sass": "(robocopy src dist *.scss /E) ^& IF %ERROR_LEVEL% LEQ 1 exit 0",
  "build-ts": "tsc",
  "build": "npm run copy-sass && npm run build-ts",
  "test": "echo \"Error: no test specified\" && exit 1"
},
Finally, you can add a component and a sass file, and generate your package by running npm run build
Reference our shared components library
OK, be prepared for the most complicated part!!… Nah just kidding
Let’s make it in 3 simple steps:
Move to your ClientApp folder (from the Front or Back for instance), and run the npm i PATH_TO_YOUR_SHARED_FOLDER command line, such as:
CD Front\ClientApp
npm i ../../shared
Typescript
To use our component from our Home.tsx file for instance, we only need import it like this:
import BlueButton from "shared/dist/components/BlueButton";
Then add our component to the render() section:
export class Home extends Component {
  render() {
    return (
      <div>
	    ...
        <BlueButton />
        ...
      </div>
    );
  }
}
Note: referencing the compiled code version (namely from the
distfolder) is required and should not reference the source code directly (namely from thesrcfolder) as it is the scenario which quite not well supported fromReactapps created usingcreate-react-app.
SASS
To use our SASS file, we can just reference it from our App.scss file like the following:
@import "shared/dist/sass/BlueButton";
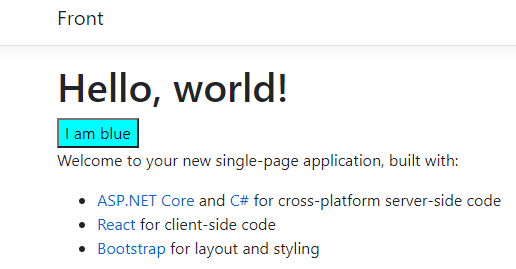
Et voilà! Our shared component is successfully installed!
Development workflow
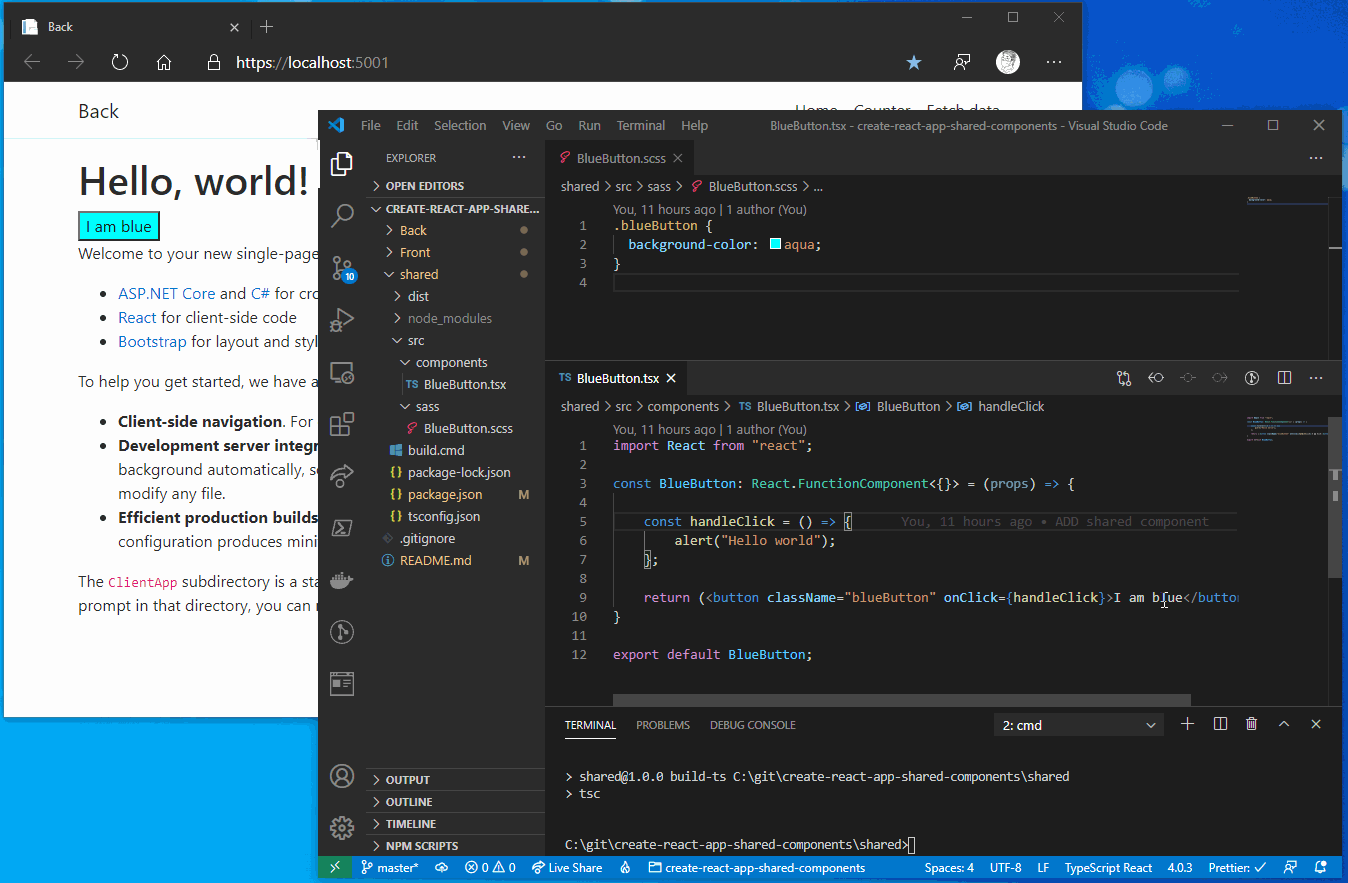
With all of this is place, you need to remember that every time you modify something from the shared library, you will need to run the npm run build command to generate the compiled code.
The good news is that the app will reload automatically when you do it:
In conclusion
And that’s the end of this small article about a simple system to share components between two React apps hosted on an aspnetcore app.
Obviously regarding the size of your project or if you want to share your components across much more applications, you would want to have a look to the other solutions I mentioned at the beginning of this article.
In any case, I hope this could help you in any way. Feel free to reach me on Twitter @vivienfabing or in the comments, and may the code be with you!