Kubernetes: Get a new environment for each Pull Request using Review Apps
Hi everyone,
So like my you have heard about the so called Review Apps new feature in Azure DevOps using Kubernetes and you wanted to know more about this is working on some more concrete example?
Well welcome to this article which will show an example of how to test this new feature currently in public preview.
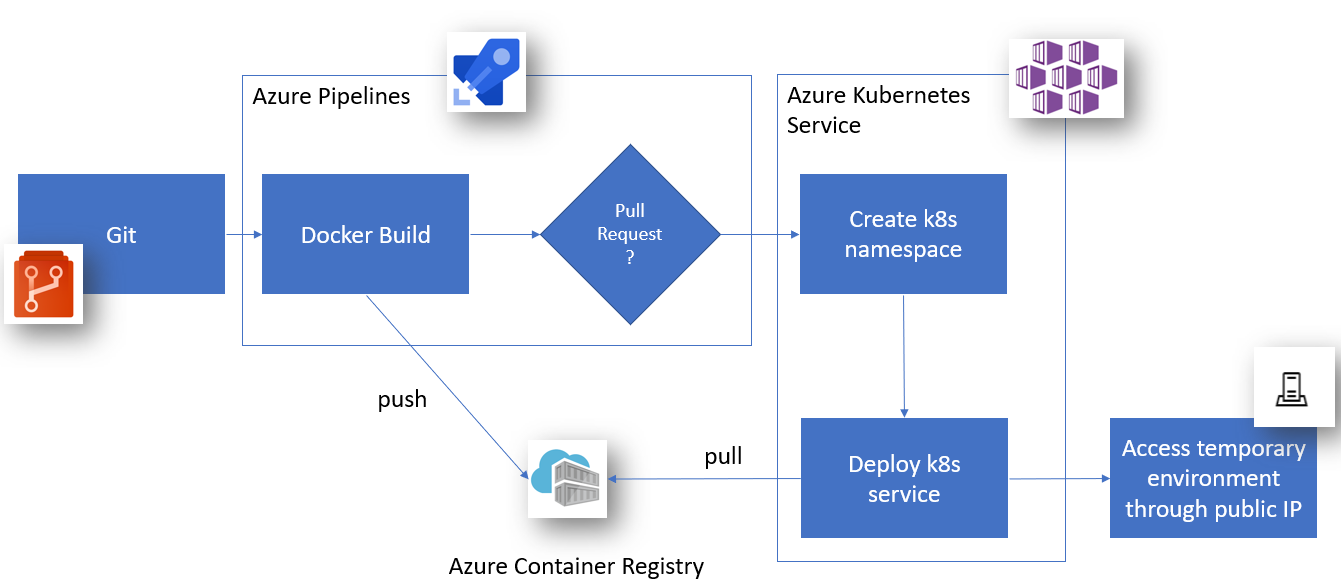
Workflow of Review Apps
In short, the only thing you really need to do is create a new YAML Pipelines from Azure DevOps using the Deploy to Kubernetes template and using the Enable Review Apps workflow for Pull Request checkbox, and that’s all!
In addition your Kubernetes cluster will be registered as an Azure DevOps environment to get a user friendly way to access the Pull Request temporary environment.
What will happen is that for every Pull Request, the pipeline will be triggered and will create a new Kubernetes namespace to deploy inside.
But enough explanation, let’s see a concrete example of Review Apps with a simple aspnetcore app.
Review Apps prerequisites
In prerequisite, we need an app to build (an aspnetcore app created with dotnet new mvc for instance), as well as a Dockerfile to generate our container image to test.
Note: To add docker support, you can use Visual Studio to generate a start Dockerfile as describe in the official documentation
You will also need a Kubernetes cluster, such as an Azure Kubernetes Service and a container registry such as Azure Container Registry.
Note: Microsoft also have some nice documentation about how to create an AKS from the Azure Portal GUI and how to create an ACR
Create new Azure DevOps Pipeline to deploy from Kubernetes and activate Review Apps
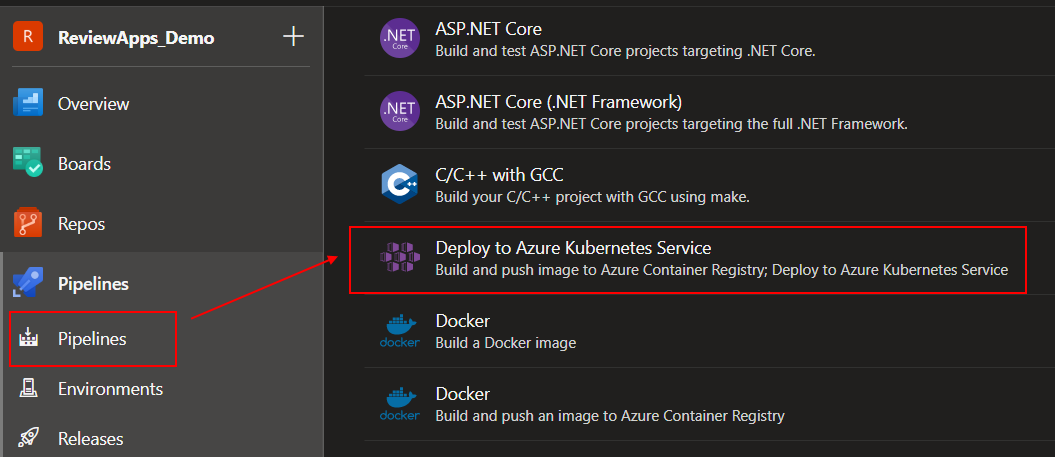
The easiest way to start using Review Apps is to create a new Azure Pipelines and select the Deploy to Azure Kubernetes Service template.
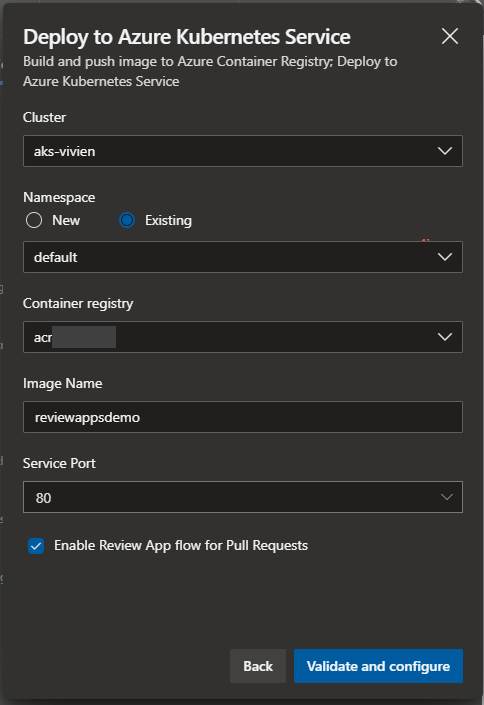
After selecting your Kubernetes cluster, you then just need to configure few things (Namespace, Container registry, the docker Image Name, the Service Port to access your environment), and more importantly, you need to check the Enable Review App flow for Pull Requests option.
This will add 3 files:
- An
azure-pipelines.ymlfile which defines your pipeline (Build, Deploy and Deploy Pull Request) - A
manifests/deployment.ymlfile which describe your app to deploy onKubernetes(docker image name and port to use) - A
manifests/service.ymlfile which describe yourKubernetesService, and especially how to access it (which port to use, and theLoadBalancermeaning it should obtain an public IP provided by the Azure Cloud provider)
If you have a look at the azure-pipelines.yaml content, you will differentiate 3 stages to be executed:
- The
Buildstage will just generate our docker images using thedocker buildcommand on our Dockerfile - The
Deploystage is to be executed when the branch build is just a normal branch, and will deploy aKubernetesservice on the configured namespace - The
DeployPullRequeststage will be triggered when the source branch is a Pull Request branch, and will create a newKubernetesnamespace and deploy the service in it.
Trigger our build automatically for each Pull Request using Branch Policies
Obviously we need the build to be triggered automatically when a new Pull Request is created, so for that we just need to add or new build to the Branch Policies
of our common branch (masterfor instance).
You can see how to configure this on the official documentation.
Fixing error “A valid name is less than 256 characters in length and does not contain the following characters”
If you try to create a new Pull Request now, you might see it fail because of a small bug in the Kubernetes namespace created, using by default the Source Branch Name, which is containing invalid characters for a Kubernetes namespace.
##[error]Resource name 'refs/heads/MY_PR_NAME' is not valid. A valid name is less than 256 characters in length and does not contain the following characters: ',', '"', '/', '\', '[', ']', ':', '|', '<', '>', '+', '=', ';', '?', and '*'.
I decided to replace it by my build name suffixed by the Pull Request ID which gives us:
k8sNamespaceForPR: 'reviewappsdemo-$(System.PullRequest.PullRequestId)'
Trigger again a new build for a Pull Request, and enjoy seeing it finally succeeding! Congratulations!
Get the Kubernetes service public ip address of the Review Apps environment
Go to the Azure Pipelines Environment tab and browse to find your Kubernetes Cluster as well as the new namespace generated for your Pull Request.
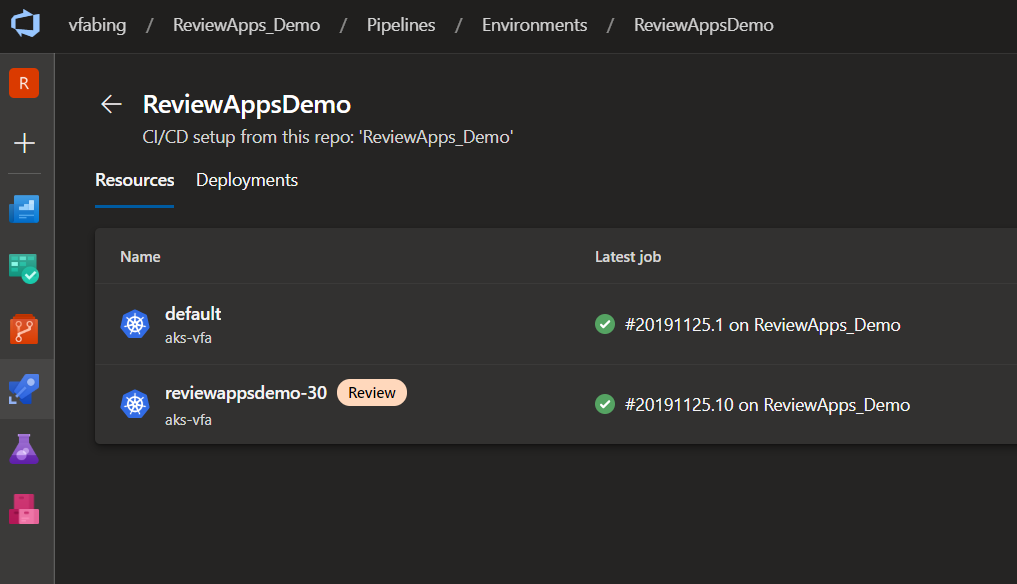
Check the Service tab of your namespace and note the public IP address.
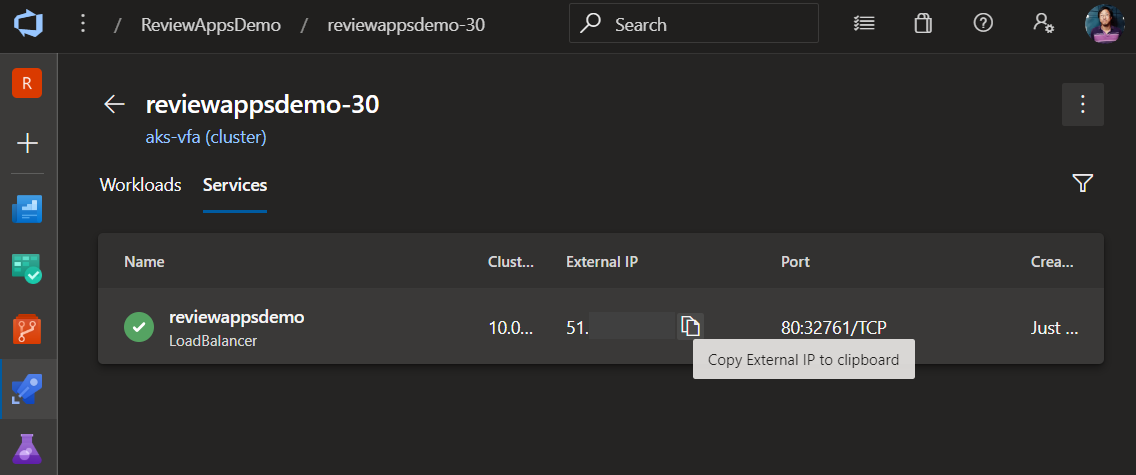
Try to access it through your web browser and you should see your Pull Request environment! How awesome is that?
No more CSS blind reviews, no more technical reviews without functional reviews, Review Apps is a wonderful tool if you want added quality to your Pull requests !
Review Apps from now on
Well, while this new functionality is still in preview, the principle is pretty simple yet really powerful! Few things I am still looking forward to complete this scenario:
- Deployment through
helm - Pushing the public IP to the Pull Request comments (removing the need to look for it by ourselves in the
Environmenttab - A automatic clean of the pull Request namespace when the merge is done.
You can have a look at my demo Azure DevOps Team Project
Feel free to react in the comments or on Twitter @vivienfabing, and may the code be with you!