How to send a dynamic email from Sendgrid with dotnetcore
Context
Sending email for notifications or confirmations is pretty common in applications, and Sendgrid email service is definitely a leader on this domain.
As an Azure user, creating a (free) Sendgrid account is pretty straightforward from the Azure Portal.
But the common problem is “how to offer a nice user interface for business user to provide their email templates while keeping it simple for a developer to enrich this template with user data ?”
Here comes Sendgrid Dynamic Transctional Templates, and the Sendgrid NuGet package in dotnetcore.
Sendgrid Dynamic Transactional Templates creation
As a prerequisites, you need a Sendgrid account, which can be easily created from the Azure Portal following the Create a SendGrid Account documentation.
Then you can access on your Sendgrid management dashboard by clicking on the Manage button.
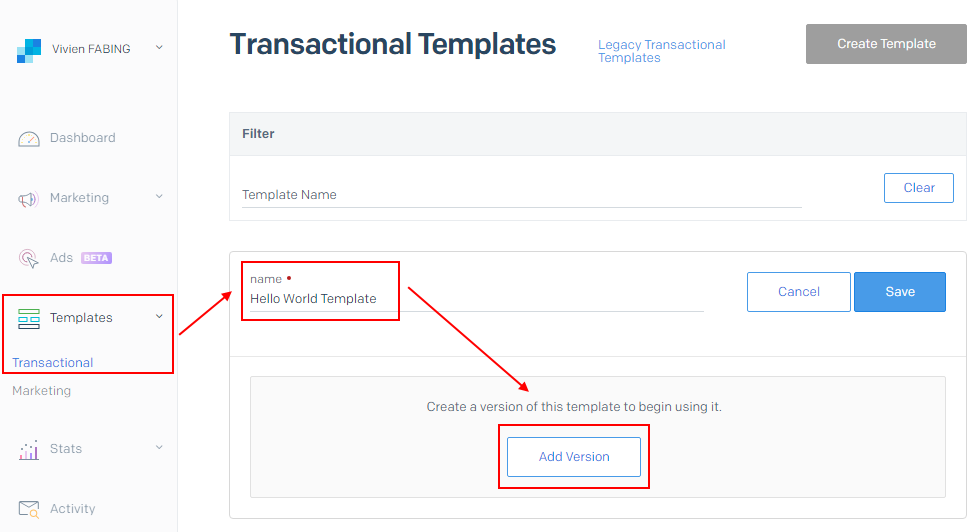
From there you can access to the Templates > Transactional and create your first template
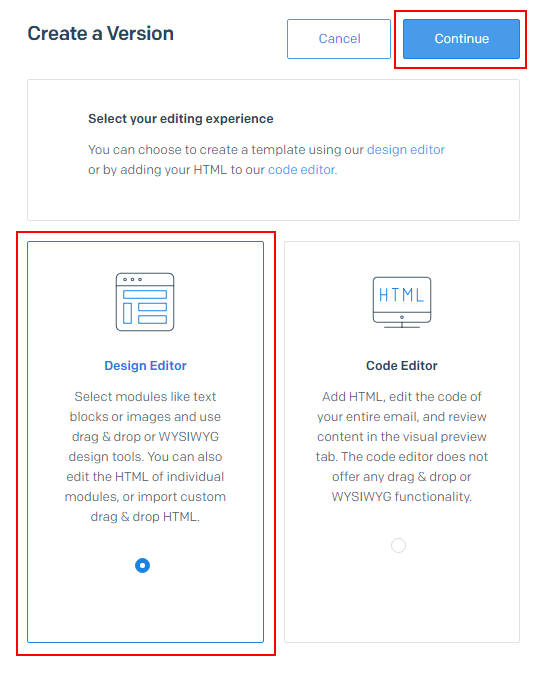
When adding a Version to your template, you will be asked which kind of edtitor you want to use. Let’s select the Design Editor to do some wysiwyg editing :)
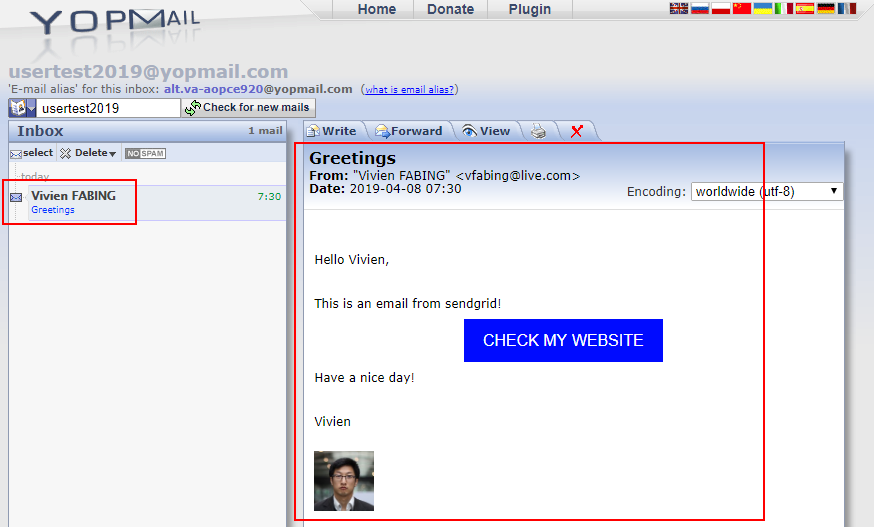
On this interface, you can configure your template settings: Configure the default sender email, the Subject, etc. but moreover, you can drag and drop many modules such as Button, Text and Image to build your email super easily.
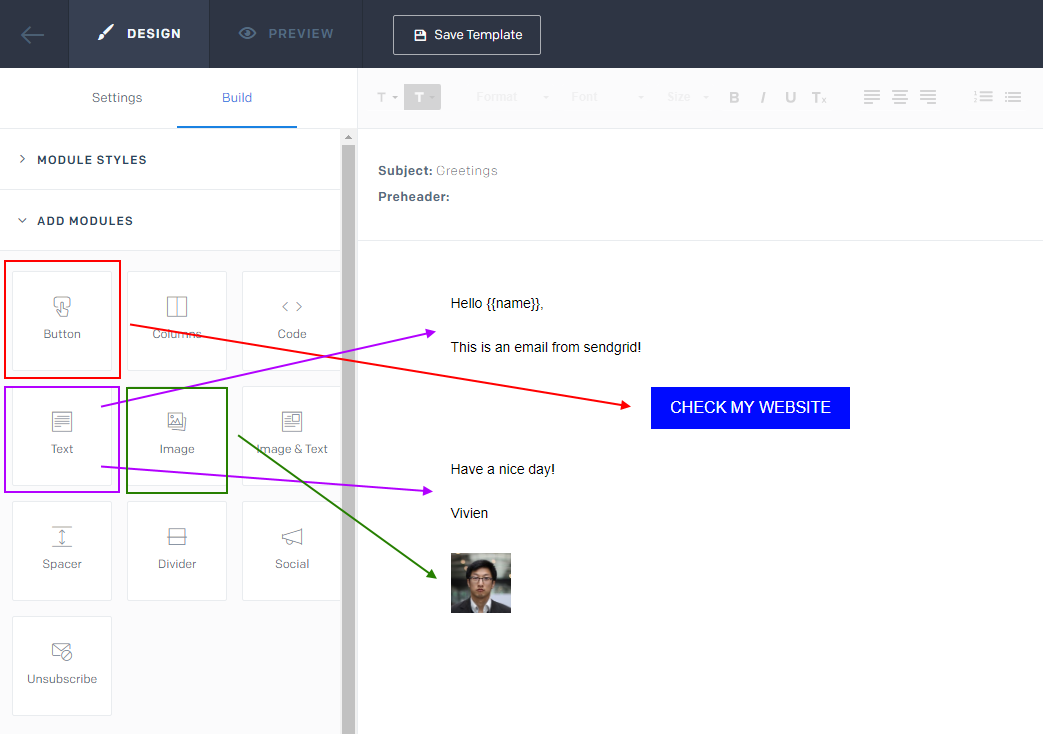
The important part here is to define your template variables by surrounding them by double brackets.
On the example, I defined a name variable and an url variable (to which the user will be redirected when clicking the button).
Prepare for sending emails
First you will need To find your SendGrid API Key.
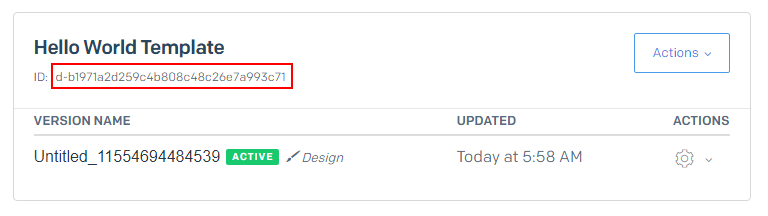
Then you will need to get your Template ID
Use Sendgrid in dotnetcore console application
Start by adding the Sendgrid NuGet package to your project.
You will then need to create a new SendGridClient which take your API Key in parameter, as well as a SendGridMessage, from which you will be able to configure many settings such as :
- The sender using
SendGridMessage.SetFrom(string email, string name) - The receiver using
SendGridMessage.AddTo(string email, string name) - Set the email Template ID to use using
SendGridMessage.SetTemplateId(string templateId) - And finally set the variables using
SendGridMessage.SetTemplateData(object dynamicTemplateData).- For this purpose, you can create a
classand decorate your properties with theJsonPropertyvalues corresponding to your template variables (the ones you surrounded with double brackets in the wysiwyg editor)
- For this purpose, you can create a
The only thing left to do is to call the SendGridClient.SendEmailAsync(SendGridMessage msg) et voilà!
May the code be with you!