Docker : ASP.NET Core container and HTTPS
ASP.NET Core container and HTTPS
Nowadays, getting your web app running in HTTPS is almost a prerequisite, even if you “just” want to be able to develop it!
That’s why when working on a non-docker ASP.NET application, Visual Studio set up for you a developer certificate in order to access your web pages in https.
However when running an ASP.NET Core app in Docker, your container is exposed through http by default, so you need to define how to expose it securely.
Let’s see what are our possibilities and how to implement them:
Easiest way: run your container in http behind a reverse proxy exposed in https?
One of the easiest way, and also the one supported by default on Azure: keep your container exposed in http behind a reverse proxy exposed in https.
You can achieve this using the App Service on Azure for instance, where you just need to specify where to pull your Docker image and manage SSL termination through the Azure Portal.
Or you could use a Nginx as a reverse proxy. You can find various way to configure it on internet, and you can also have a look to what have written my colleagues Thibaut and Thomas on their blogs :).
Even though it is one of the easiest way to get a container exposed in https (after all, you just keep running it in http as you would do before), there are some times when you don’t want or you can’t have a reverse proxy and need to enable access to your container directly in https (When nobody around you has the knowledge of how to set up a Reverse Proxy, or for any other reason).
Let’s see how to expose our container directly in https then.
Use SSL with Kestrel in Docker
When you run your ASP.NET Core app using dotnet run, your app is hosted on the Kestrel web server, of which you can set up https access.
If you have a look at the official documentation, you have two built-in ways of doing this: one for running a development container, and one for a production container.
Most of the steps are common for these two ways, and the main difference being to use the user-secrets in the development version against using environment variables in the production version.
Let’s implement the production way on this article:
First of all, we need a certificate:
- For your
productionenvironment, you will probably need a certificate signed by a trusted authority, being Let’s Encrypt, VeriSign, GoDaddy, etc. - For your other environment, a self signed certificate should do the job (though each computer accessing the website will either receive a horrible
Your connection is not privatepage before accessing your website or you will have to trust your self signed certificate on every computer).
Fortunately, for the second option, you have some command in the dotnet cli which can help: dotnet dev-certs.
Create a self signed certificate to use in your container
To create a self signed certificate, you can run the following command line:
dotnet dev-certs https -ep %USERPROFILE%\.aspnet\https\mycertificatename.pfx -p mycertificatepassword
Where mycertificatename.pfx is the name of your certificate, and mycertificatepassword is its password.
Note also that the certificate is stored in the folder %USERPROFILE%\.aspnet\https which is containing the dotnet dev-certs generated certificates.
Then you will need to trust your self-signed certificate (if you want to prevent the Your connection is not private message). For this 2 solutions: either you browse to your certificate and install it by double clicking it, or you can just execute the following command line:
dotnet dev-certs https --trust
This command line look for certificates in your %USERPROFILE%\.aspnet\https folder and automatically trust them for your. Pretty simple isn’t it ? :)
Run your container using your certificate
Alright, let’s see the main part of this article: How to run your container and tell it to secure it’s access using the previously generated certificate!
For this, we just need this one line:
docker run --rm -it -p 5000:80 -p 5001:443 -e ASPNETCORE_URLS="https://+;http://+" -e ASPNETCORE_HTTPS_PORT=5001 -e ASPNETCORE_Kestrel__Certificates__Default__Password="mycertificatepassword" -e ASPNETCORE_Kestrel__Certificates__Default__Path=/https/mycertificatename.pfx -v %USERPROFILE%\.aspnet\https:/https/ aspnetcore-react:latest
Where:
--rmand-itare standard docker command line telling the container to self remove when exited and to display the logs in the console output.-p 5000:80and-p 5001:443are the mapping forhttpandhttpsaccessASPNETCORE_URLS="https://+;http://+"is used to tellKestrelto listen tohttpsandhttpurlsASPNETCORE_HTTPS_PORT=5001is used to tell the port used in the url to access the app inhttps-v %USERPROFILE%\.aspnet\https:/https/is used to mount the local folder%USERPROFILE%\.aspnet\https, containing the certificate, into the folder/httpsinside of the container.-e ASPNETCORE_Kestrel__Certificates__Default__Path=/https/mycertificatename.pfxis used to specify where to find the certificate to be used for encrypting traffic.ASPNETCORE_Kestrel__Certificates__Default__Password="mycertificatepassword"is used to specify the certificate password. Obviously for production environments, the password should be specified secretly (by usingAzure PipelinesSecrets for instance ?)
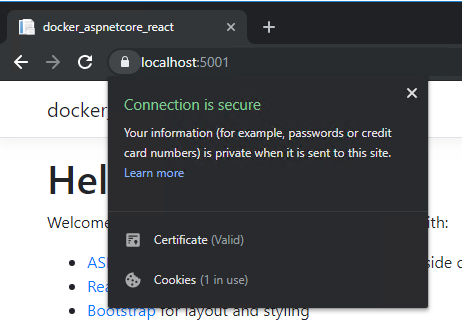
Access to your container using https://localhost:5001 and…
That’s all, hopefully this article helped you to start more easily with Docker and ASP.NET Core.
Feel free to reach me out on Twitter @vivienfabing or anywhere else, and may the code be with you!