Azure Pipelines: How to add a build agent with Azure Container Instances - part 2 : Custom Agent
Context
In the previous article, we have seen the easiest way to add a build agent to your Azure DevOps organization in 1 command line.
However, since this method takes around 10 minutes to get it warmed up, let’s see if we can do better by creating our own custom docker build agent.
Start with the template from Microsoft documentation
Go to Running a self-hosted agent in Docker and get the Dockerfile and start.sh.
These two files are the minimum required to run a container with an azure pipeline agent installed and running inside.
Create a private container registry using Azure Container Registry
Follow the official Microsoft documentation for that, using Azure Portal or Azure CLI.
Build the image using ACR Tasks without Docker installed on your computer!
In this step, you are going to generate a docker image without even having docker installed on your computer! Pretty neat isn’t it? :)
Connect to your Azure Subscription using az login and az account set if not already done, then run the following command:
az acr build --registry MY_ACR_NAME --image MY_IMAGE_NAME .
where :
MY_ACR_NAMEis to the name of the Azure Container Registry created in the previous step,MY_IMAGE_NAMEis the name of the image you are going to create and push into the registry. You can also specify a Tag suffix (by default set tolatesttag)
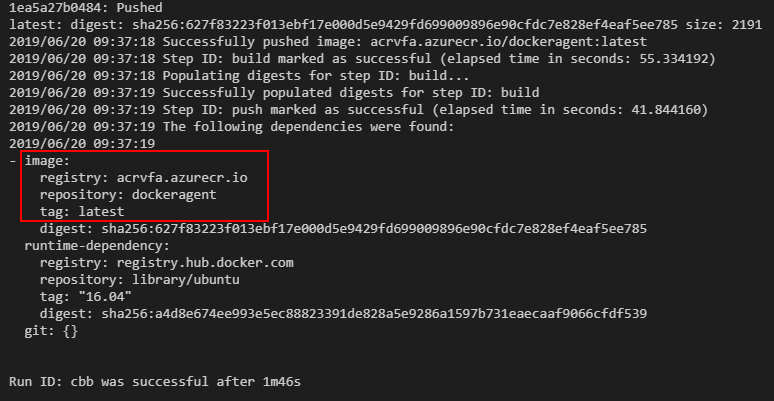
This command takes all files in the current directory (that is to say the Dockerfile and start.sh files from previous step), zip and send them on your Azure Container Registry, then execute docker build command.
After few seconds, your image should be built!
Run the custom docker agent in Azure Container Instances
In order to keep this scenario simple, let’s allow the Admin account, to be able to access the Azure Container Registry from Azure Container Instance in a simple way.
Keep note of the login and password to use in the next step.
For a more secure scenario, have a look at Authenticate with Azure Container Registry from Azure Container Instances using a
Service Principal
Then run the following command line
az container create -g MY_RESOURCE_GROUP -n MY_CONTAINER_NAME --image MY_ACR_NAME.azurecr.io/MY_IMAGE_NAME:latest --registry-username MY_ADMIN_LOGIN --registry-password MY_ADMIN_PASSWORD --cpu 4 --memory 14 --environment-variables AZP_URL=MY_ACCOUNT_URL AZP_TOKEN=MY_AZUREDEVOPS_TOKEN AZP_AGENT_NAME=MY_AGENT_NAME AZP_POOL=Default AZP_WORK=_work
Where :
--imageis the full path of the custom image--registry-usernameis the admin login--registry-passwordis the admin passwordAZP_URLis your Azure DevOps account nameAZP_TOKENis a PAT (Personal Access Token), used to access to your Azure DevOps account. (To generate one follow Create personal access tokens to authenticate access)AZP_AGENT_NAMEcorresponds to your build agent name, displayed in Azure DevOpsAZP_POOLcorresponds to the agent pool where you want your build agent to belong to. If not specified the Default agent pool is used.
You can find more information of other parameters used in az container create command line on docs.microsoft.com
Example
az container create -g aci-vfa-rg -n mycustomdockeragent --image acrvfa.azurecr.io/dockeragent:latest --registry-username acrvfa --registry-password E5O7wLHtxVsnfGorE5O7wLHtxVsnfGor --cpu 4 --memory 14 --environment-variables AZP_URL=https://dev.azure.com/vivien AZP_TOKEN=cu6zvey2eqsfipsb2m5wexdxwabdpdky7emq7asbz3eqkxjgehma AZP_AGENT_NAME=mycustomdockeragent AZP_POOL=Default AZP_WORK=_work
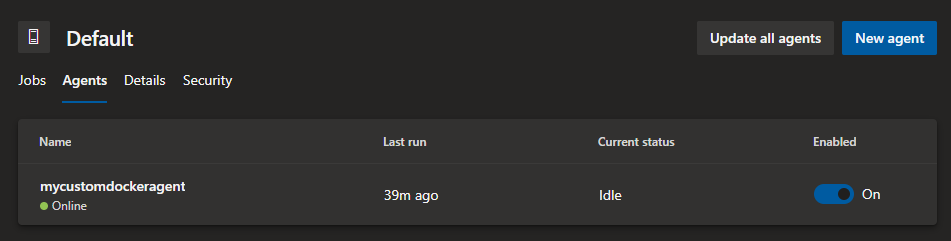
Wait for few minutes…

..and boom! Say hi to your new build agent :)
Customize your custom build agent with dotnetcore-sdk
Let’s try to run a new aspnetcore build on our new agent:
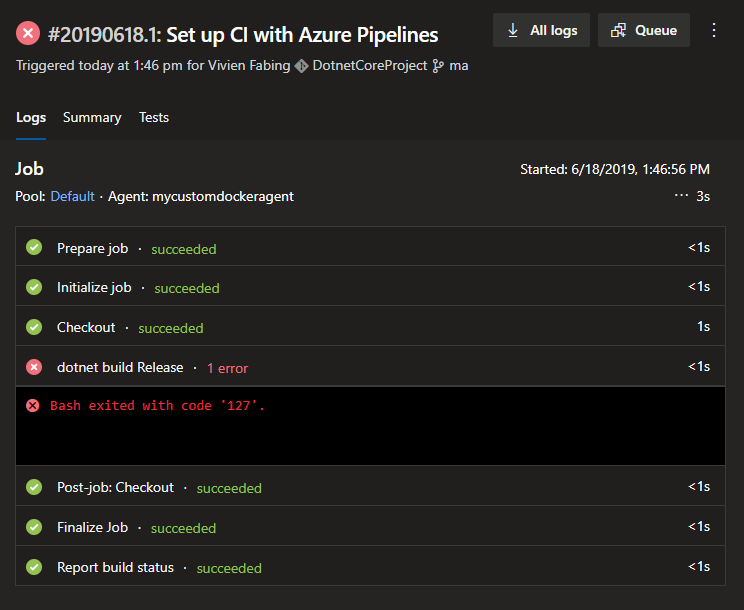
Oh no! dotnet-sdk is missing…
Since our Docker container is based on ubuntu 16.04, let’s see how to get the dotnet-sdk installed on it.
According to the documentation, we need to install it by adding the following lines to our Dockerfile
RUN apt-get install -y wget
RUN wget -q https://packages.microsoft.com/config/ubuntu/16.04/packages-microsoft-prod.deb
RUN dpkg -i packages-microsoft-prod.deb

RUN apt-get install apt-transport-https
RUN apt-get update
RUN apt-get install dotnet-sdk-2.2
Let’s rebuild the image on ACR, then recreate the container on ACI, then execute the build again and…
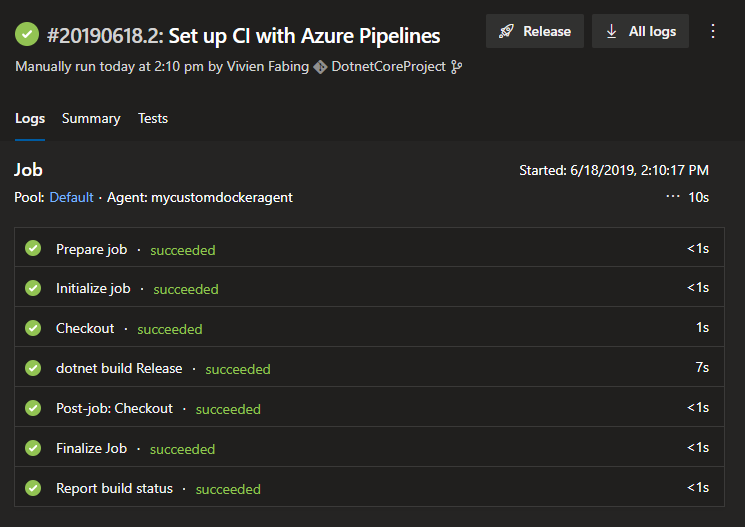
Oh joy! The build is now succeeding, and it didn’t take 10 minutes to provision a build agent using ACI :) (Still took 2 minutes, but without any optimization to the Docker file)
Now that we have seen that we can get a build agent provisioned on Azure DevOps in minutes, what if we could get a build process which would “create” a build agent at its start, and “delete” it when the job is done ?
That’s a subject for a future article :)
May the code be with you!
P.S.: a working Dockerfile sample can be found on github, and if you just want to try to play with the agent, you can try and get it from dockerhub using the following command line:
az container create -g aci-vfa-rg -n mycustomdockerhubagent --image vfabing/azure-pipelines-agent-dotnet-core-sdk:latest --cpu 4 --memory 14 --environment-variables AZP_URL=https://dev.azure.com/vivien AZP_TOKEN=6ykqrgvwml74eta7ttpi6lqqkiklr6xnvibwo56d4xjpawez5x3q AZP_AGENT_NAME=mycustomdockeragent